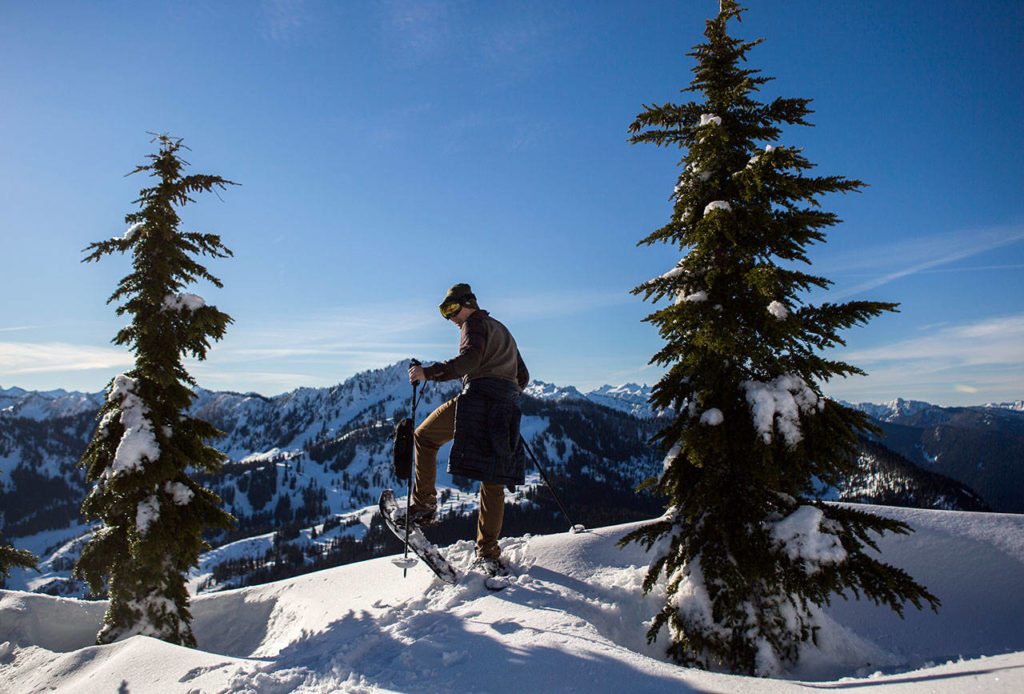
As I scanned the many peaks surrounding Stevens Pass from a perch of about 5,000 feet, it occurred to me that this is why people snowshoe.
You’ve spent the past hour trekking uphill, sometimes carving through fresh snow and ignoring the burning sensation in your legs, only to see another hill up ahead. Maybe you stumble a bit here and there, or fall when you’re laughing at your friend, but you keep going.
You don’t have to reach the top, but if you do, you’re rewarded with plenty of exercise and some expansive mountain views. Then you plop down on your back and make a snow angel so you can feel like a kid again.
My first snowshoeing trip to Skyline Lake at Stevens Pass this past Saturday was memorable for all these reasons and more. It was also a great learning experience, but more on that later.
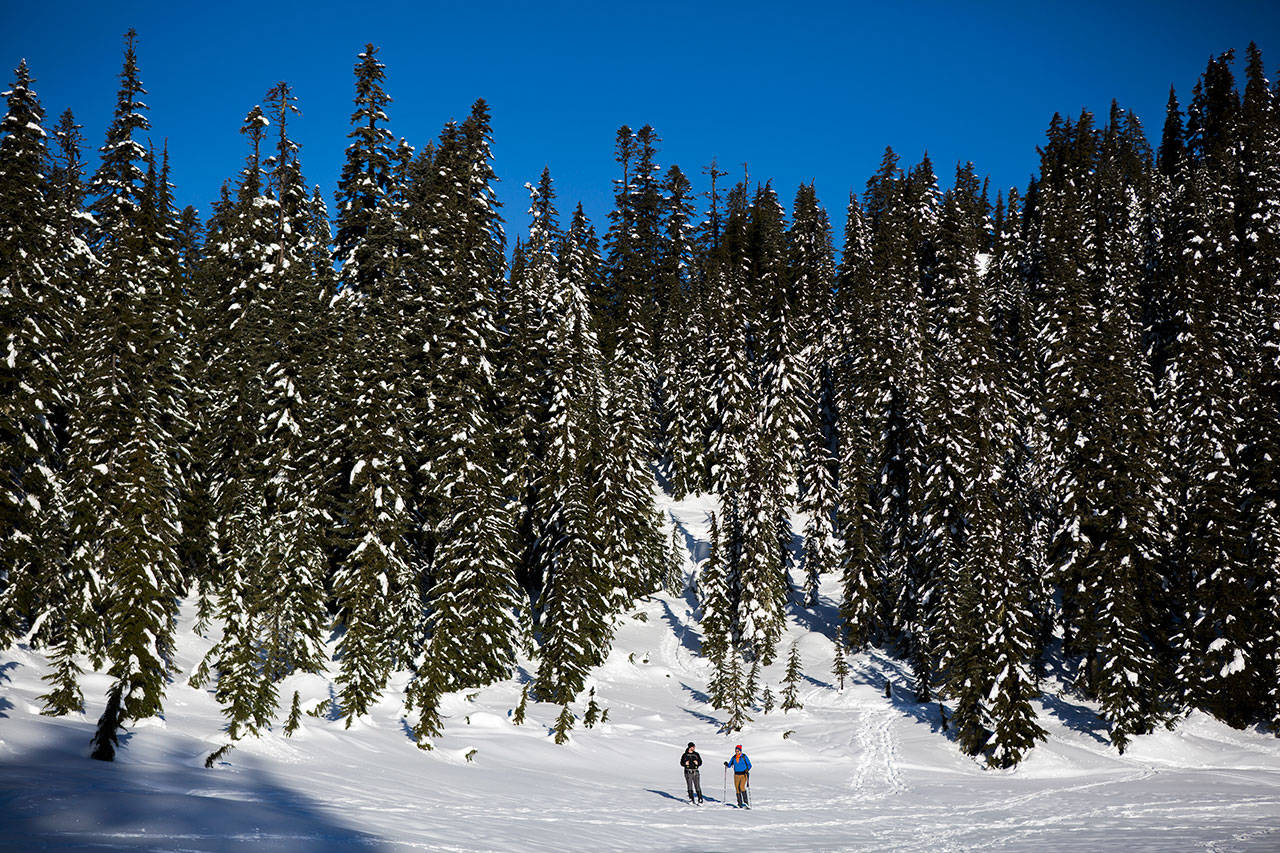
Two snowshoers make their way across Skyline Lake on Saturday, Jan. 26, 2019 in Leavenworth, Wa. (Olivia Vanni / The Herald)
I was invited to hike the 3-mile trail with Don Sarver, the safety officer and wilderness first aid instructor for the Mountaineers Everett branch. I couldn’t have asked for a better guide for my first trip; the 38-year-old Army veteran has 20 years of snowshoeing experience and provided me with plenty of useful tips and guidelines to follow.
Joining us was my friend Kyle James, who also was new to snowshoeing.
Sarver chose the trail because of its accessibility, deep snow and limited avalanche risk. It leads up to Heather Ridge, which sits across from Stevens Pass and peaks at 5,100 feet. We could easily see the front of the mountain resort, as well as Cowboy Mountain and Big Chief Mountain towering above it, while we navigated a series of fairly steep hills and switchbacks during the first mile of the hike.
The route — used by snowshoers, backcountry skiers and snowboarders — was a great training ground for newbies like us, who were still getting used to our snowshoes during the first half of the trip, though it helped that Sarver was clearing a path in the snow for us to follow. Every once in a while, we veered slightly off trail to put our snowshoes to the test and walk through fresh powder on our own.
Canada jays, known as “camp robbers” for stealing food from humans, followed us along the way. Sensing their eagerness, James extended his palm and offered them a cookie crumb. It was snatched up almost immediately by one of the birds.
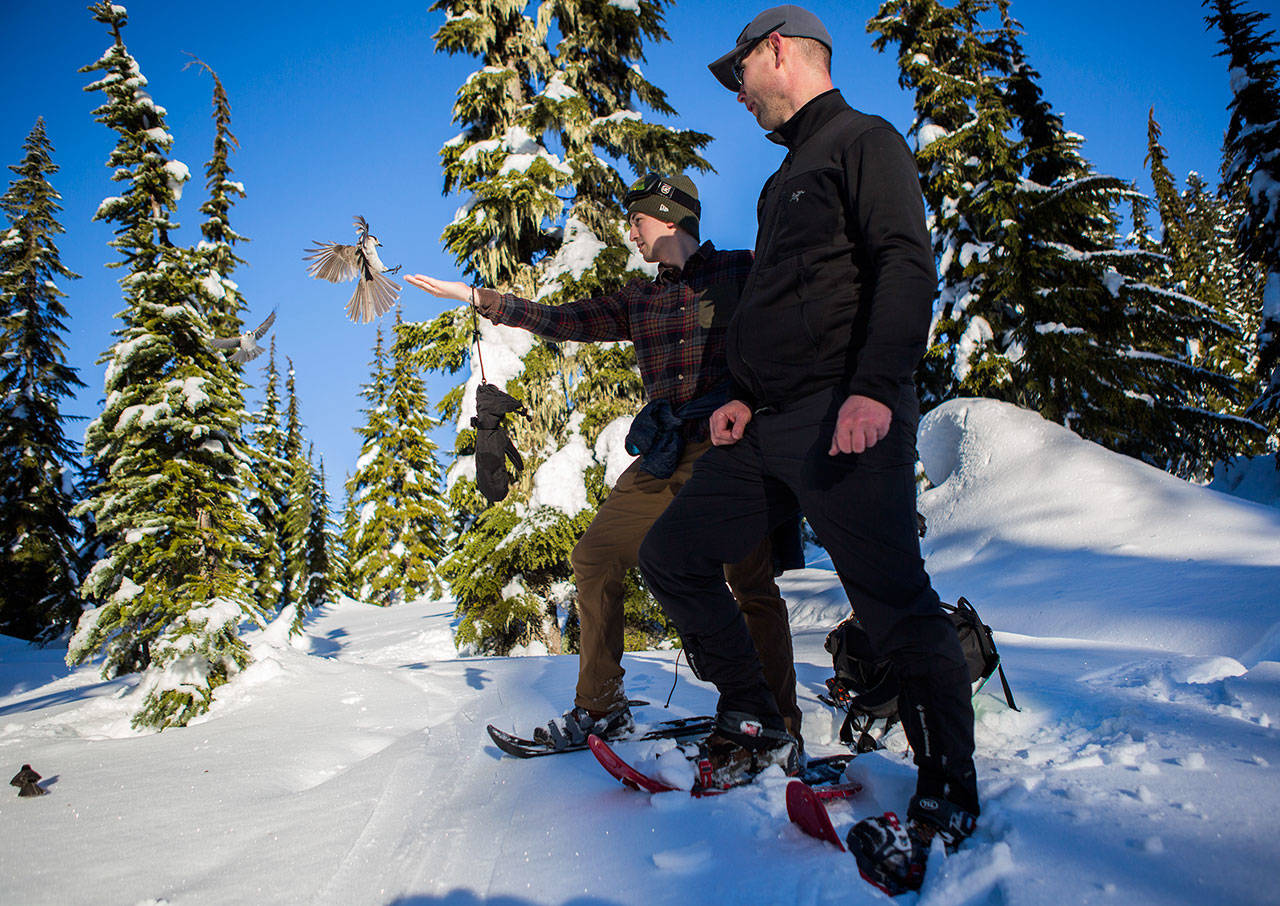
Kyle James, left, holds his hand out for a Canada jay while Don Sarver, right, looks on. (Olivia Vanni / The Herald)
As much as we enjoyed the moment, Sarver reminded us that it’s part of hiker etiquette not to feed wildlife. The balance of nature is important.
The trail gradually levels out the higher you climb, then flattens at Skyline Lake. The lake is covered in snow this time of year, but it’s generally ill-advised to walk across. Here, we saw overnight campers and a few early morning hikers, but mostly had the the lake to ourselves.
“When you’re not walking on somebody’s else’s tracks and getting to step in fresh powder yourself, that to me is magical,” Sarver said.
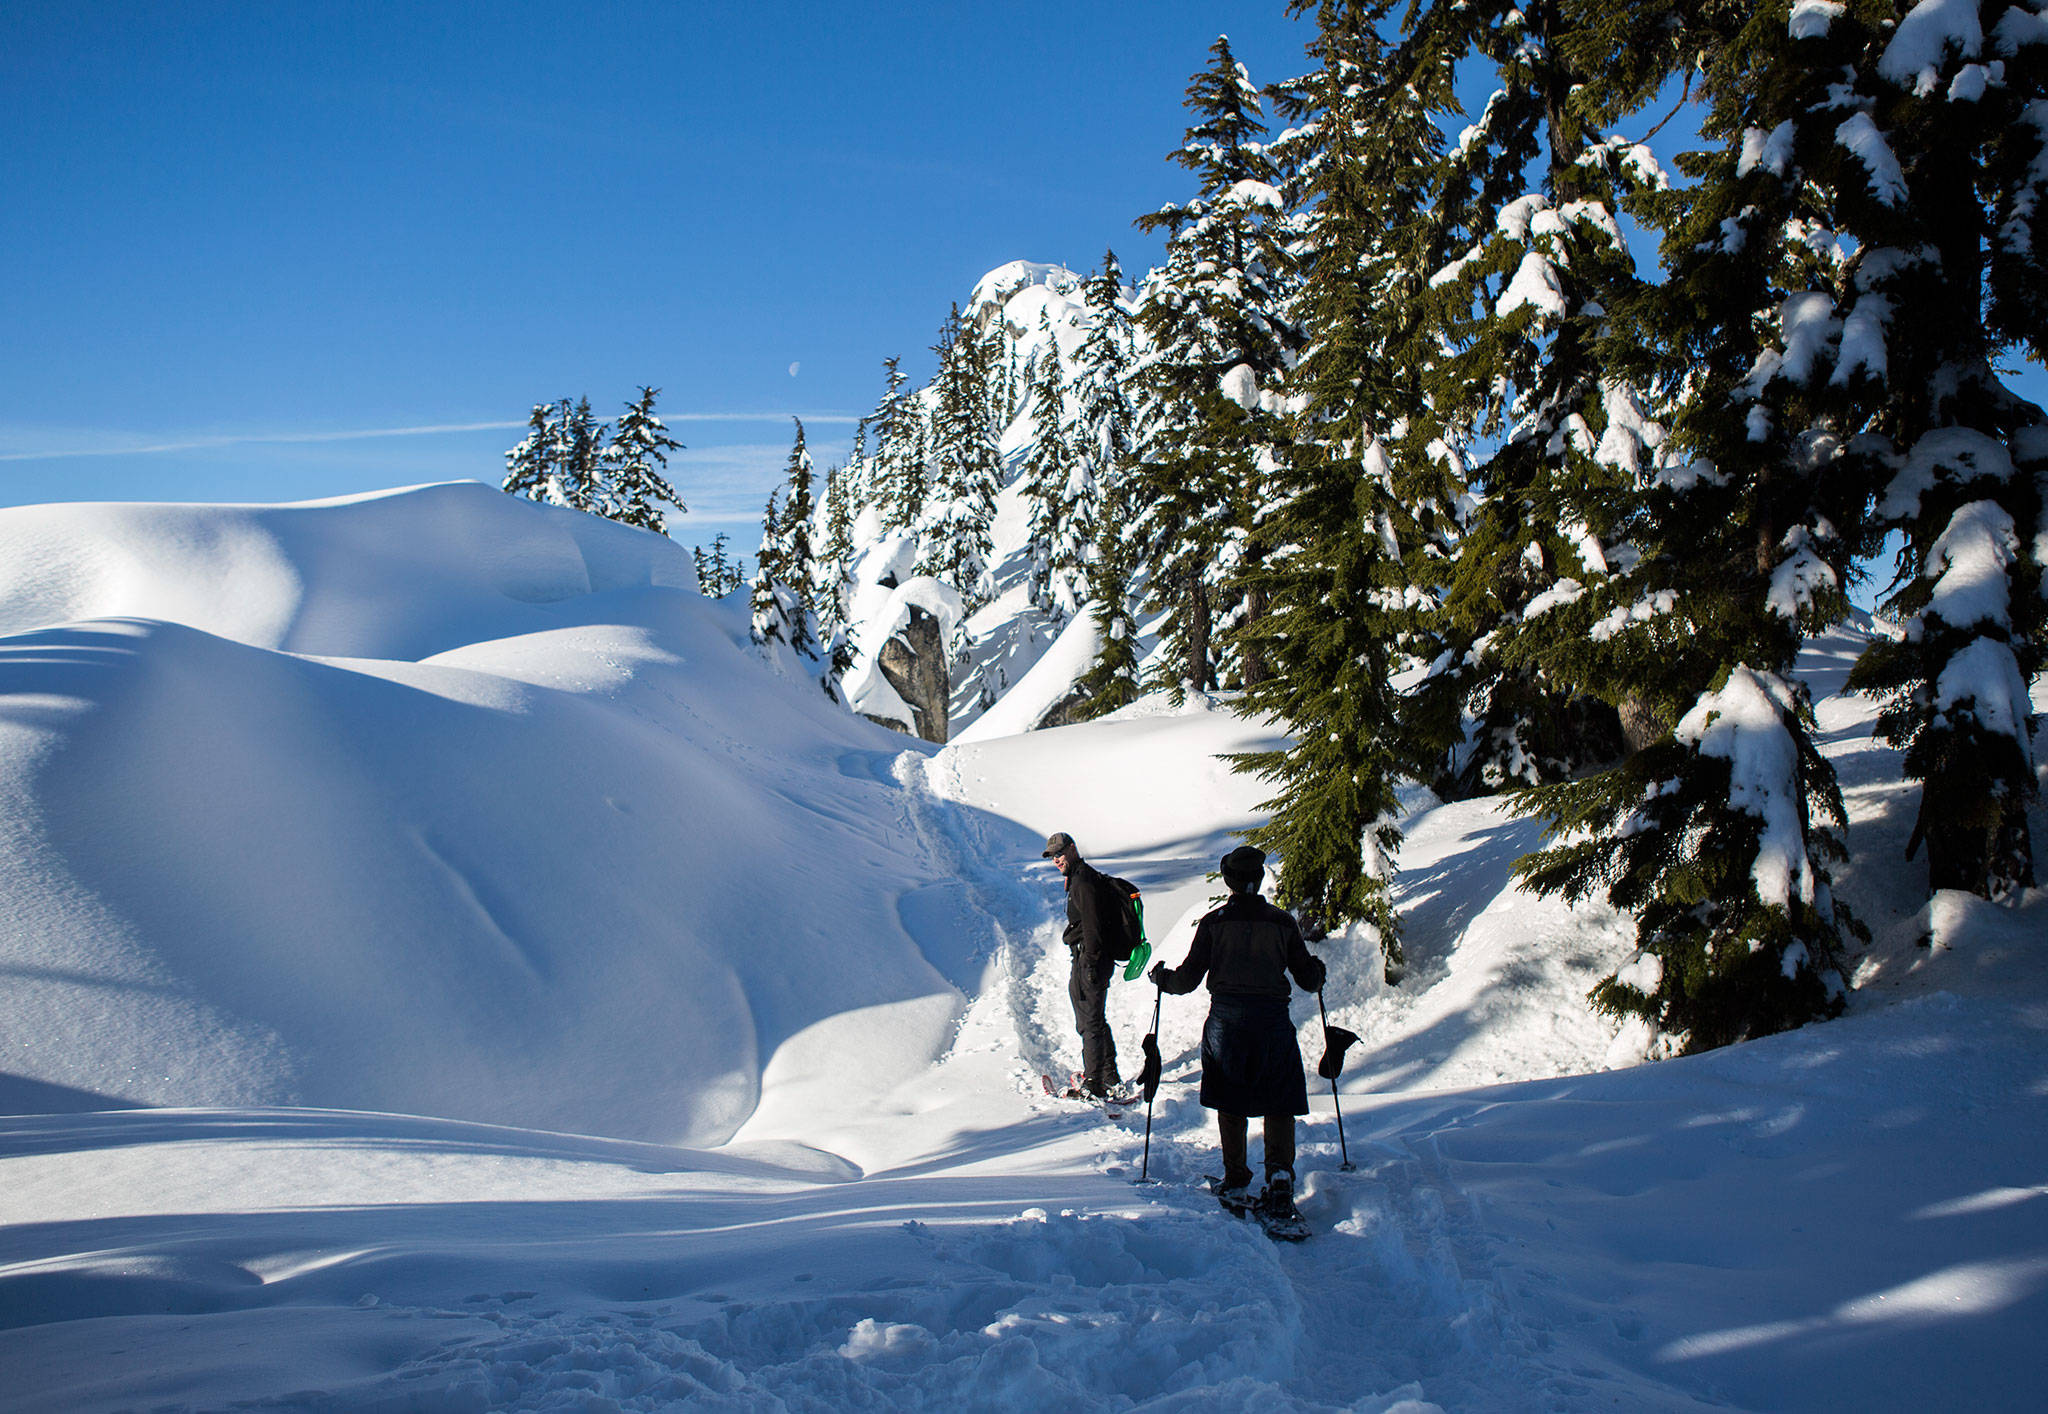
Continuing onto a ridge northwest of the lake, climbing another 100 feet, we could see a number of peaks, including Glacier Peak and Mount McCausland. It was here that Sarver warned us about the rock garden up ahead.
Enormous rocks, some the size of houses, were covered in snow. We followed the trail, meandering around the rock garden, making sure to steer clear of the open spaces around the rocks that would surely be incredibly dangerous to fall into.
The highlight of the day, for me, was standing on one of the ridge’s clearings and looking out across the mountain peaks. Below was U.S. 2 and a steady stream of weekend skier traffic.
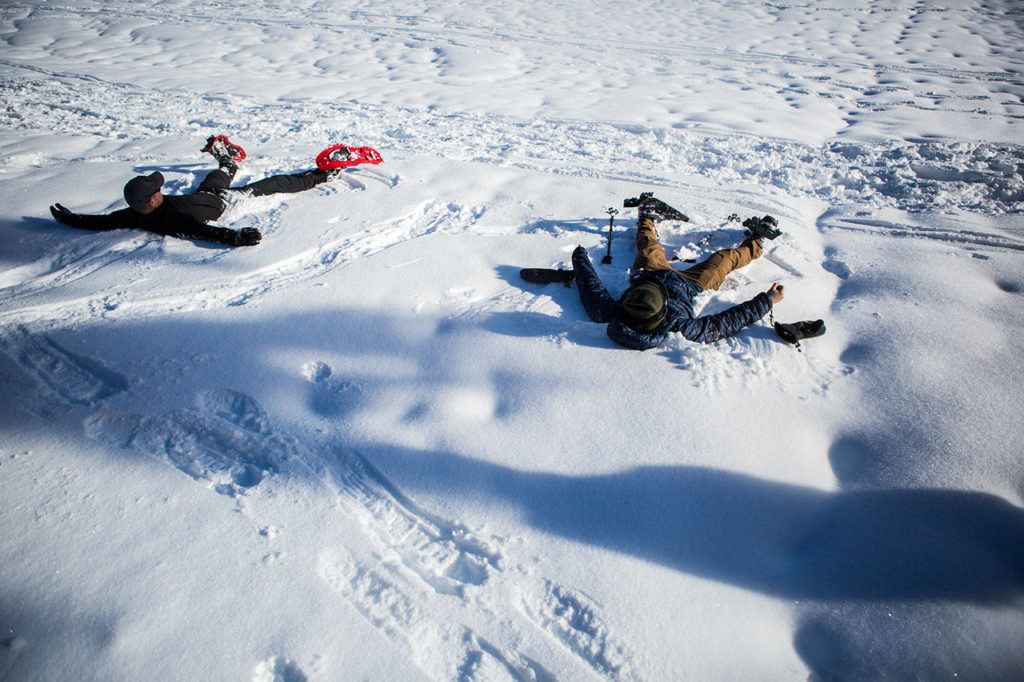
As we left the ridge, Sarver had an idea. When we reached the lake, he promptly took off his pack and fell on his back into the snow and started making a snow angel. Kyle and I joined him. The tough part was keeping the snow angel intact, but it was the effort that counted.
“No matter how old you get, when you’re laying in fresh powder, it makes you feel like a kid again,” Sarver said. “You get to play around in the snow.”

Don Sarver, left, and Kyle James, right, make snow angels on the Skyline Lake Trail on Saturday, Jan. 26, 2019 in Leavenworth, Wa. (Olivia Vanni / The Herald)
I already have the itch to go snowshoeing again. There’s plenty of time; the conditions we experienced — with a solid snowpack and areas of powder — will last until about mid-March at the Skyline Lake Trail. You can snowshoe on the trail through April, possibly even early May. Other snowshoe trails, such Panorama Point in the Mount Rainier area or trails around Mount Baker, could be good all the way up until early June.
Here are a few more lessons learned from my first snowshoeing trip:
Renting is easy. Alderwood REI is stocked with snowshoes, where you can rent them for $22 a day if you’re a member and $44 if you’re not (a lifetime membership is $20). Make sure they’re available by calling ahead and reserving a pair. If you don’t have hiking boots, you can rent those for $14 from the Seattle REI (Alderwood REI doesn’t rent them). Poles ($10 for members and $20 for non-members) also come in handy when climbing and descending steep hills.
Get there early. There are a few reasons for this, but it’s mostly because Skyline Lake Trail’s parking lot fills up quickly. We were among the first to arrive around 7:30 a.m., but by 11:30 a.m. the lot was completely full. There’s an added bonus, too. While the trail was by no means empty, it felt far more serene not seeing anyone for long stretches of time.
Walking in snowshoes is weird — at first. Your first few steps might feel awkward, but walking in snowshoes isn’t hard. Your instinct might be to walk like a duck, but it’s best to walk normally and rely on heel walking downslope or on your toes when going uphill. The snowshoes will take care of the rest.
Delayering is key. Bring plenty of layers, but be ready to shed them during your hike. I wore far too many layers on the first leg of the trip and ended up depleting a good deal of my energy. To make matters worse, sweat freezes and makes you colder. Bring a pack with room for clothes and other essential items, such as food, sunglasses or goggles, gloves, extra dry clothes and the 10 essentials: navigation (map, compass and GPS system), sun protection, insulation (jacket, hat gloves, rain shell and thermal underwear), illumination (flashlight, not your smartphone’s light), first aid kit, fire starter, repair kit (duct tape, knife, screwdriver and scissors), nutrition and water.
Stumbles are OK. Every one of us fell at least once on the trip. Don’t be embarrassed if you do. In fact, it’s kind of fun. When getting back to your feet, flip over to your stomach and use your elbows or hands to lift you back up.
Don’t stray too far from the trail. Carving your own path can be fun, but be cautious. Sarver was equipped with a GPS that kept us within a reasonable distance of the trail, but warned us that straying too far can be dangerous. Not every off-trail path needs to be followed, either.
Evan Thompson: 425-339-3427, ethompson@heraldnet.com. Twitter: @ByEvanThompson.
If you go
The Skyline Lake Trail can be found in the northern parking lot of Stevens Pass. No parking passes are required.
More www.wta.org.
Talk to us
> Give us your news tips.
> Send us a letter to the editor.
> More Herald contact information.
Gallery